Hi everyone! My family and I have made it safely to Japan and I’ve just finished creating my new blog! Here’s the link if you want to see it, I hope you like it:
It’s Been Awhile…
Hi guys, sorry it’s been a while. Today’s post is going to be pretty long and soppy, so feel free to skip it if you want. So here’s the let down…
When I first started The Branch | By Megisha I was still pretty young, so my parents didn’t want me to tell you much about our lifestyle or what my real name is. (Megisha is my nickname). Now that I’m older, I can tell you about SOME of that stuff, but I think it would be just too awkward.
Also, I haven’t found much time for this place, especially now. My family is homeschooled, so that should leave me PLENTY of time for you guys right? WRONG. On Monday, my little sister has Girl Scouts. On Tuesdays, we leave at 2:00 for my dance class followed by martial arts, followed by boy scouts, and we don’t get back until 9:00. Wednesdays, I have another dance class at 4:15 to 5:15. Thursdays, we leave at 1:30 for homeschool gym, followed by a trip to the library, followed by martial arts until 8:00. So we have that, and schoolwork. Friday, Saturday and Sunday are the only “free days” we have, but the thing is, we’re getting ready to move.
Yup, we’re leaving Germany. Where? Japan. We’ll be leaving around the end of July and beginning of August.Why? (secret about to be revealed here) Because we’re a military family. (anyone surprised here?) So getting ready to move is also taking up a lot of time.
Another reason why I haven’t been super caught up around here, it’s just that I’ve lost my fines in The Branch | By Megisha. Don’t get me wrong, I love writing and you guys are great. It’s just the blog itself I’m losing interest with.
I’ve kinda wanted to start a new one for a while now, but I wanted to wait until after we moved. I wanted to tell you guys that when we have settled in but, meh. I wanted to tell you guys sooner rather than later.
So I’m quitting this blog. Don’t worry, I’ll send in a link for the new one when it’s arrived. Until then, this is goodbye. I’m sorry, but, see you guys later…

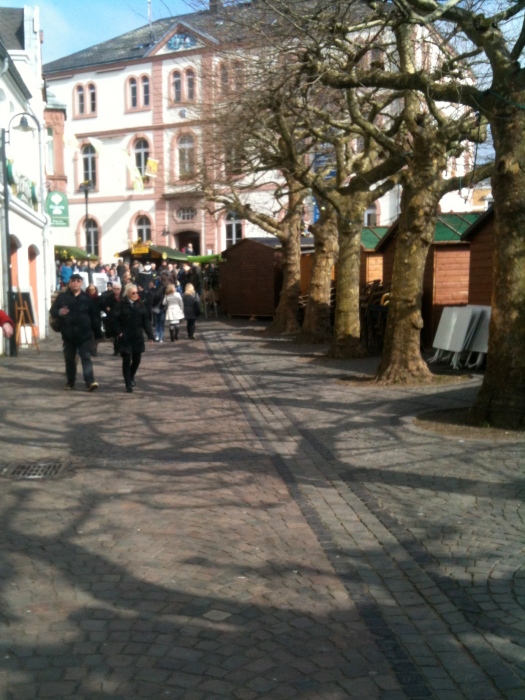
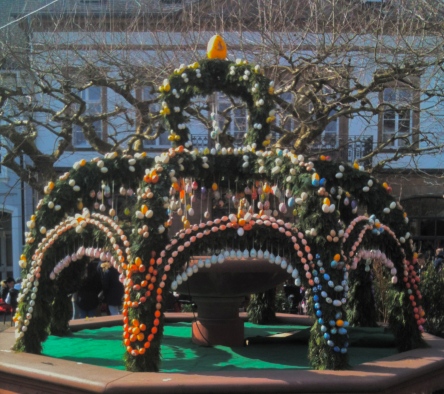
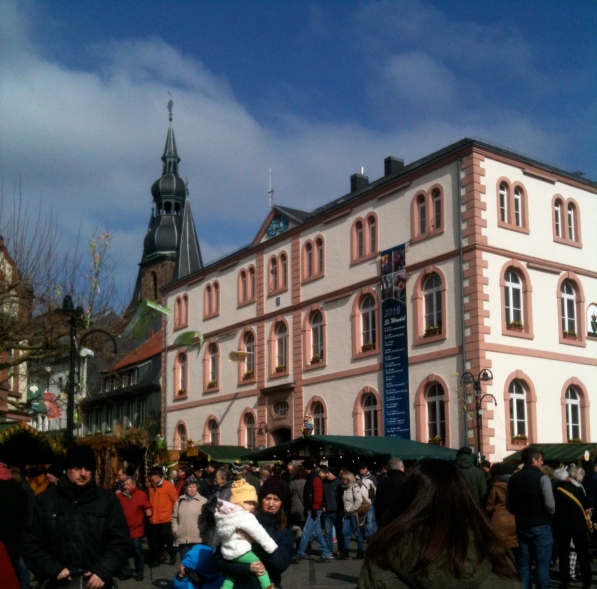
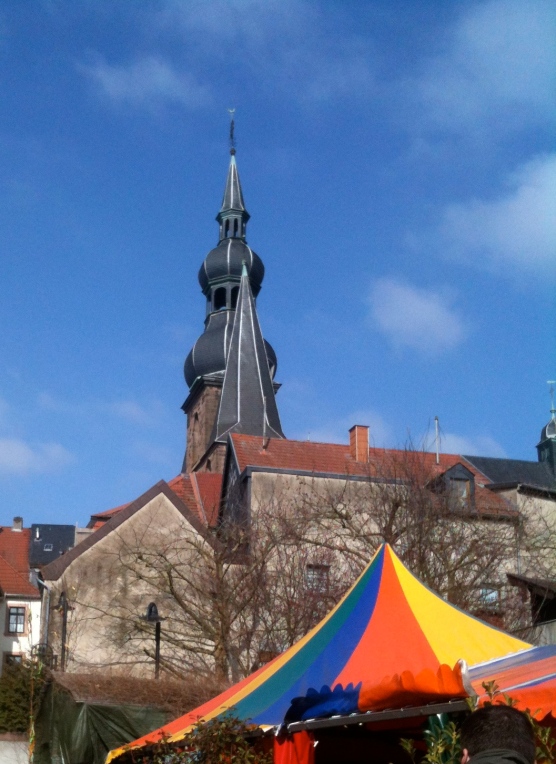
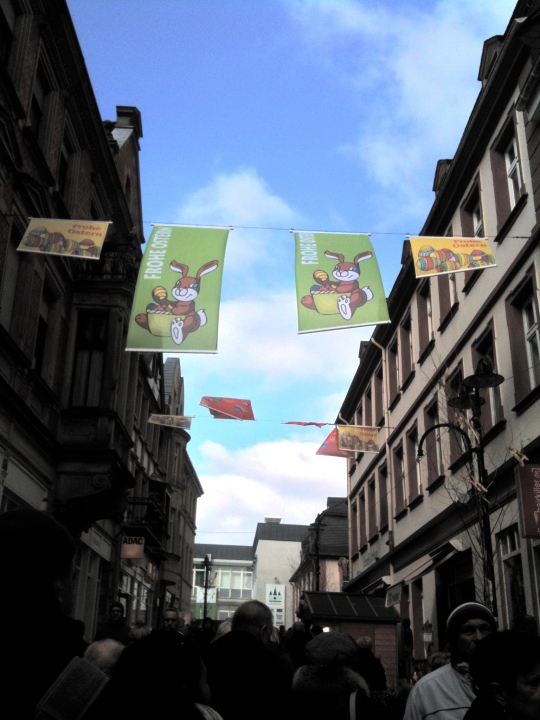
Easter Festival at Saint Wendle
One of the best things about Germany is all of its festivals. Most of them are held in the winter, around Christmas, but Easter is also a popular holiday over here, so we get to see some of those to.
This was actually our first Easter Festival, so my family and I were pretty excited when we headed down over to Saint Wendle for their annual festival. We were not disappointed!

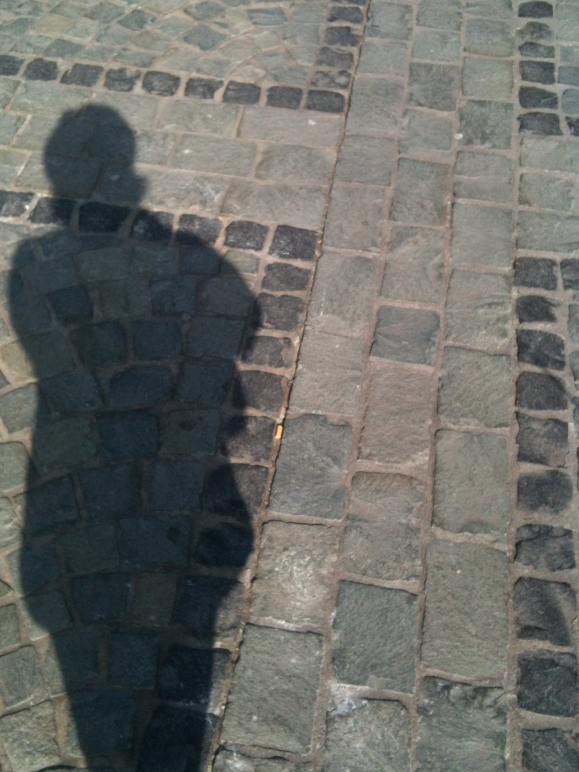
Shadow Selfi
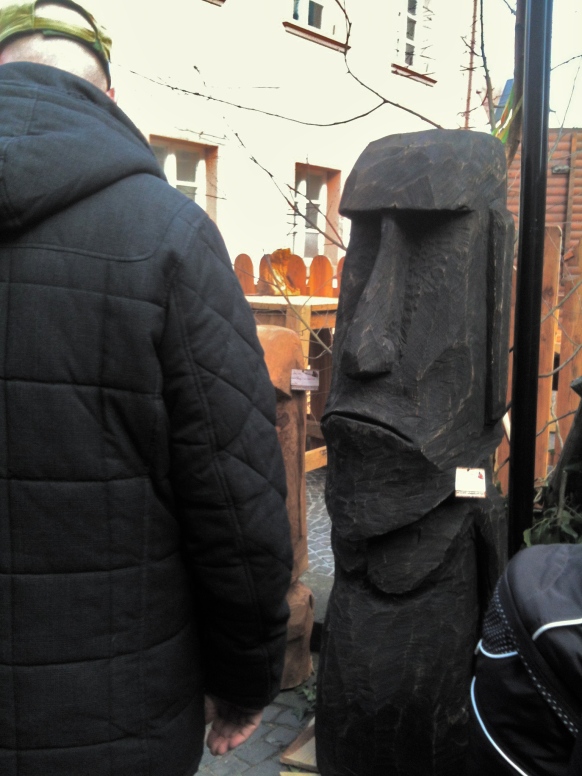
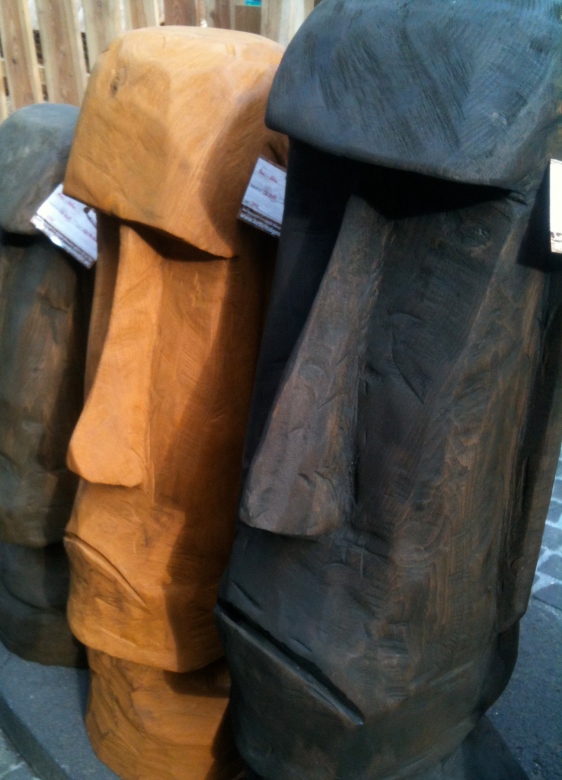
After a little exploring, we found ourselves in a little kid area, where there were three rather uh, unusual guests.
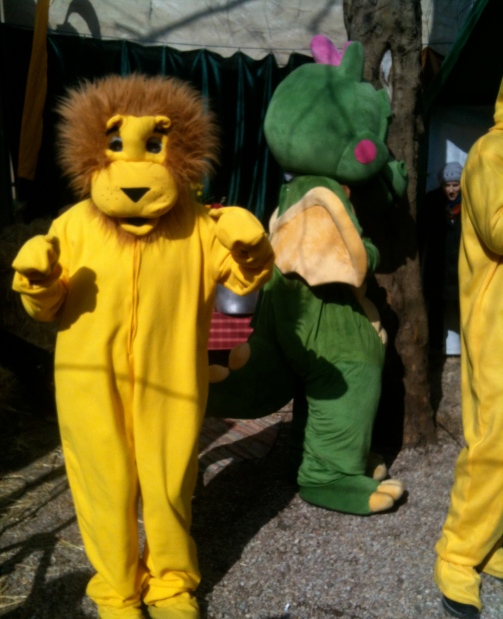
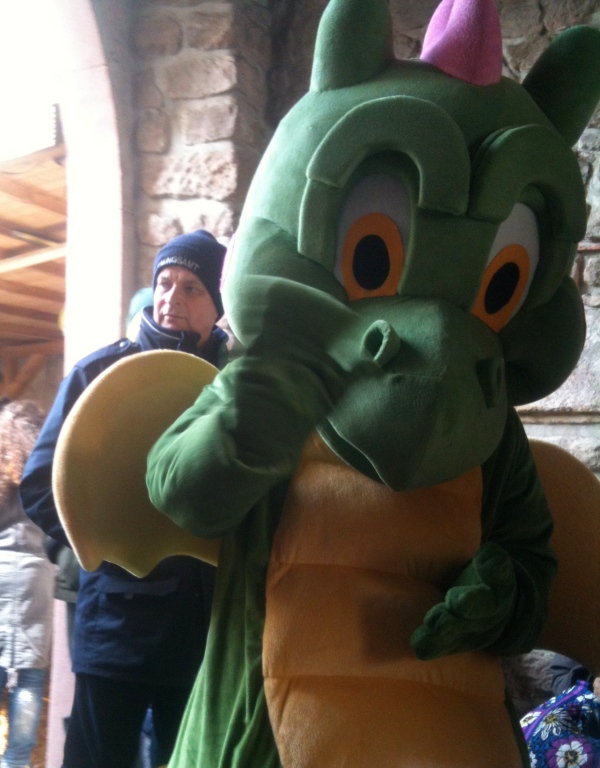
Photobomb!
After that, we started wandering around the market booths.
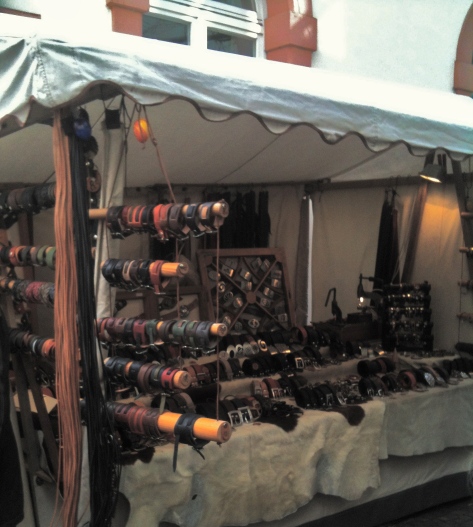

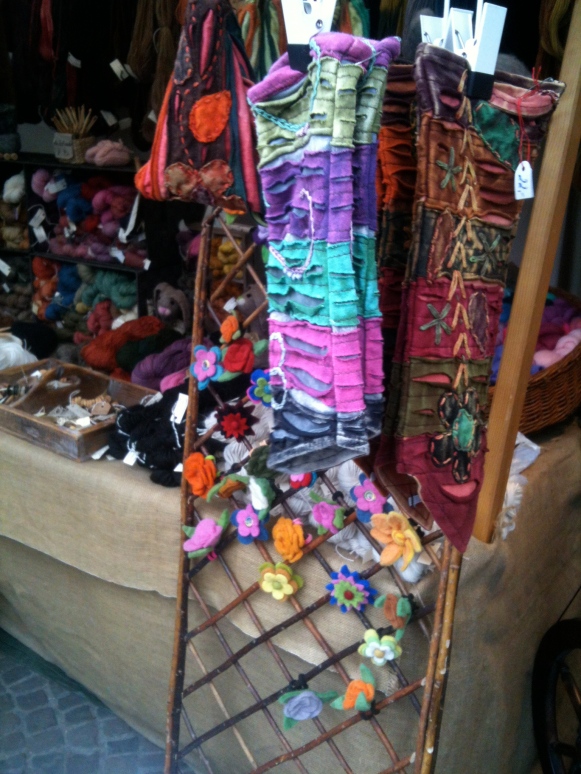
I have to admit, I was pretty tempted to by a pair of these…
Next, we wandered up to a spatzle stand and got some cheesy heaven…
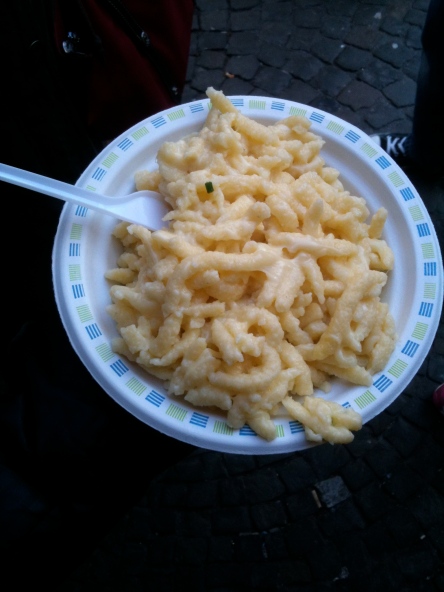
Favorite. German. Food. EVER…
After polishing off the spatzle (sooo good…) we found ourselves standing in line for churros.
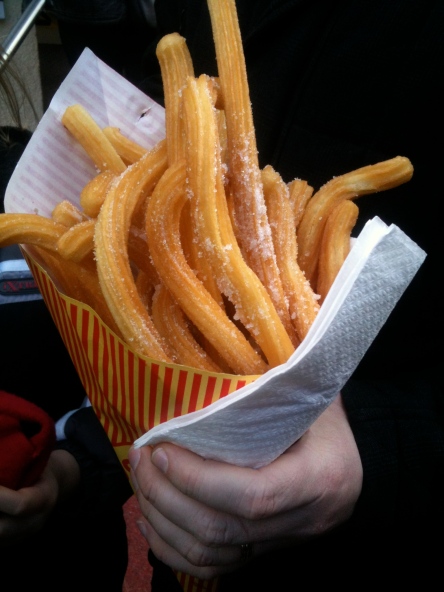
Yum…
Once the churros was a treasured memory, we continued to walk around the festival for another thirty minutes. Eventually though, we headed back to the car and drove home. Once there, everyone was so pooped out we did nothing but nape and veg out for the rest of the day.
. . . .
I hope you enjoyed our latest adventure! Subscribe to be up-to-date on the newest posts and I’ll see you guys soon!
Chasing Winter Away
Once a year in my village, there is a huge bonfire to celebrate the coming of spring. We go to it every year since we’ve moved here. However, I failed both times to document the event. But not today!
. . . .
To start, everyone comes to the village square and buy torches. Then we wait for a little bit until it gets dark. Then, we light the torches!


Afterwards, we march through the village, then climb up a part of the mountain to where the giant woodpile is. The fun part, is when we throw our torches into the woodpile, and setting it ablaze!


Then, all of the kids play a game of tag, the adults drink their beer, and huddle close to the fire to stay warm. Since we came along with some of our friends, who have a small infant among them, we didn’t stay very long. But, nonetheless, it is definitely a fun experience, if you’re near Olsbrucken around the 20th of February,you won’t be disappointed!


Meh, Valentine’s Day…
I really love holidays. Valentine’s day, not so much. It’s just feels so, commercialized and overly lovey-dovey. Sure, I try to do a Valentine’s DIY or two, but I get super lazy and end up not doing anything on here until a week after the holiday’s over. :^P
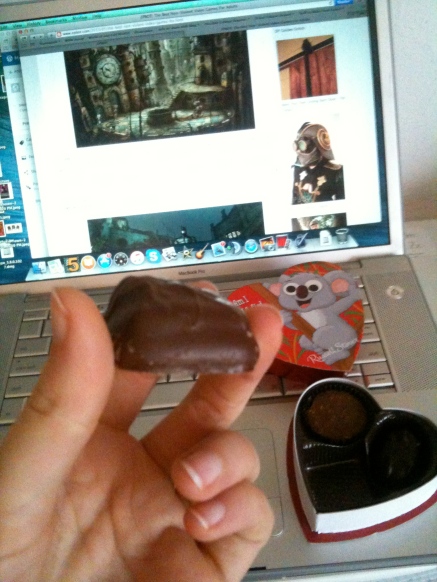
Besides eating chocolates at my computer all day…
I could continue ranting on, but that would be boring, and since this post feels way to short, I’m gonna post a couple links to a few semi-Valentin’s day-ish videos and call it a day…
Making Valentines With Lindsey Stirling
This last one isn’t Valentin’s day related at all and I’ve already posted it before, but who can resist a steampunk violinist? Not me!
Cheers!
Valentine’s Day Heart Envelope
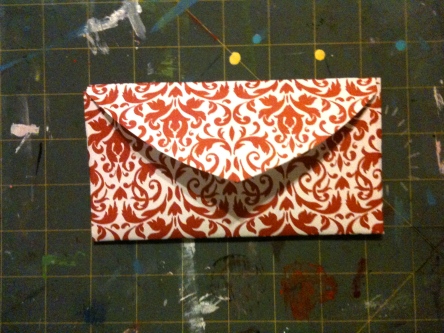
Ok, so this tutorial isn’t exactly pure-blooded origami. But, since it’s almost Valentine’s Day, and because this a really easy and simple way to make a fancier gift, I’ll let it slide just this once. ;^)
Level: Easy
Step 1.
Fold your paper in half, and cut out a half heart shape.
Step 2.
Unfold your paper, and fold the two opposite ends inward by a couple inches, depending on the size of your heart.
Step 3.
Turn your heart around 180 degrees, then fold the bottom edge upward.
Step 4.
Now just fold the top part over and crease the paper. Now your envelope is complete!

Step 5.
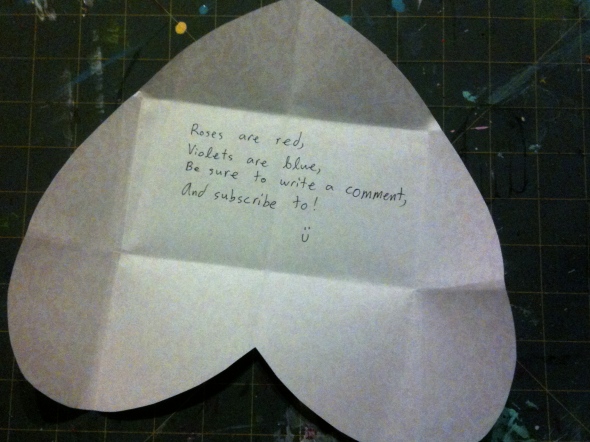
Well, almost. Quickly unfold, write a little poem, refold, then you’re done!
Cheers!
Origami 101: The Supple T-Shirt
Level: Very Easy
Step 1.
Place your paper pattern side up.
Please excuse all of the folds, I’m reusing a sheet of origami paper I’ve already transformed into a shirt! (I’m running out of paper!)
Step 2.
Fold a small section of the paper over. About half an inch, depending on what he size of your paper is.
Step 3.
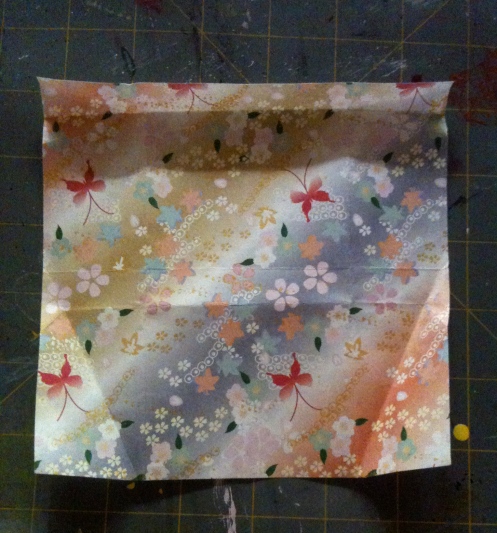
Flip your paper over. Then, take a section of the two edges and fold them over.
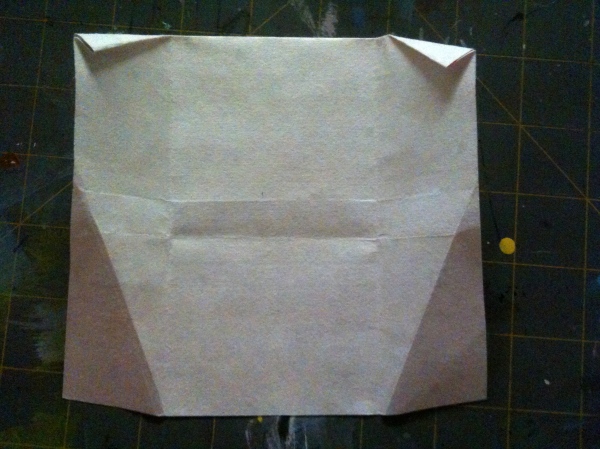
Step 4.
Take the ends of your paper and fold then inward. Make sure they’re evenly spaced before permanently creasing them.
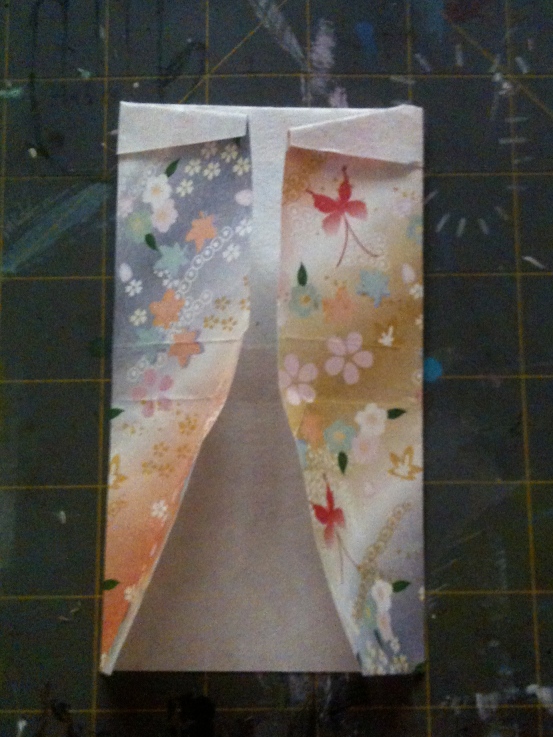
Step 5.
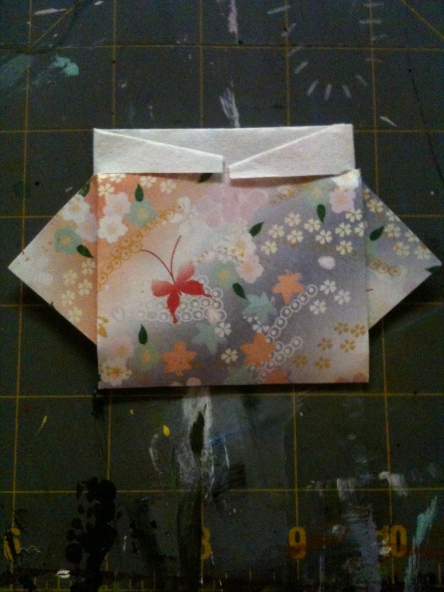
Fold the two corers in the center of the rectangle outward. These will make the sleeves.
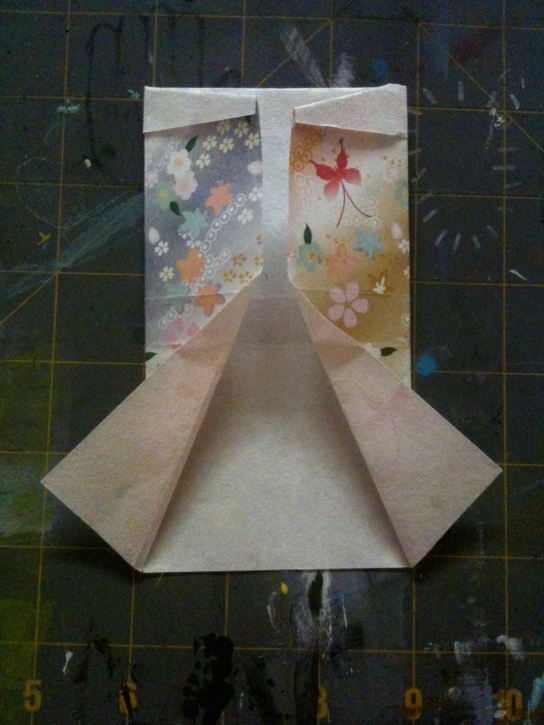
Step 6.
Now fold the whole rectangle in half, so the sleeves are touching the “collar”.
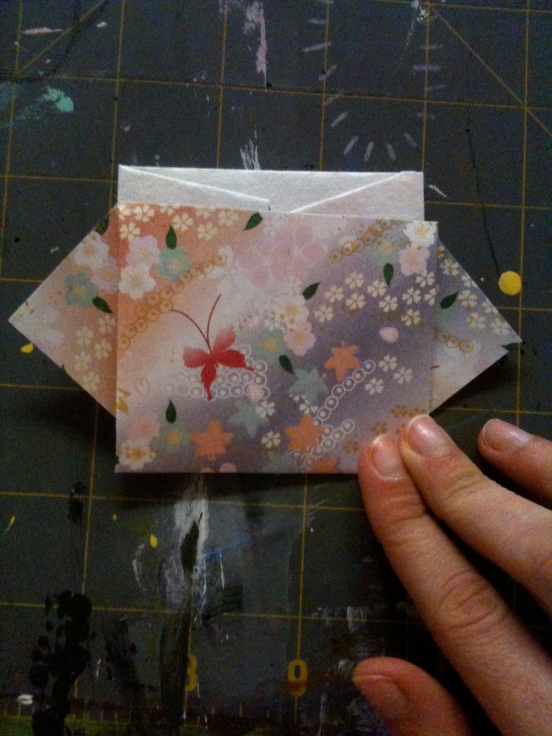
Step 7.
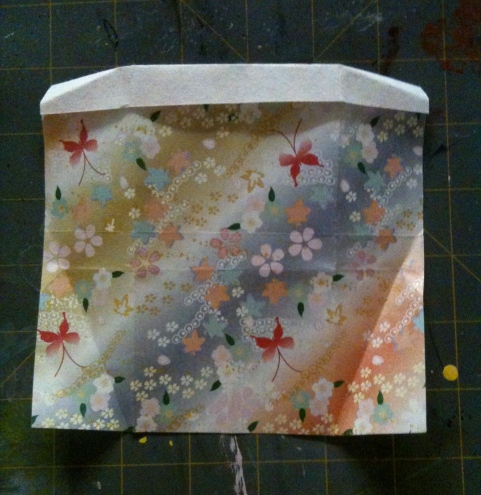
Last step! All you have to do now is tuck the end underneath the collar!

This “T-shirt” is really easy, and it doesn’t use that many folds! Therefore, after folding it, you can unfold your shirt, write a note on the inside, re-fold it, and pass it on to a friend!
Cheers!
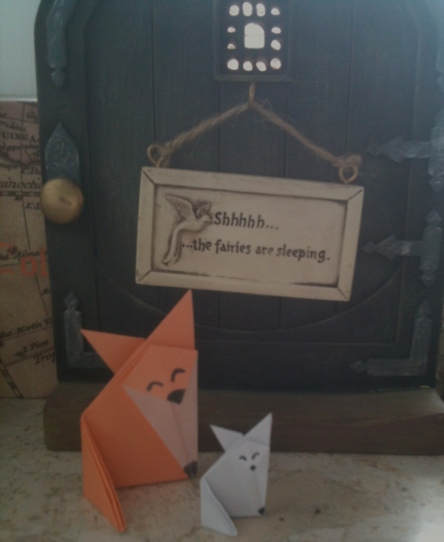
Origami 101: The Cuddly Fox
Double Cute!
Hello everyone! Today, I’ll be starting off a brand new, semi-weekly series of posts called Origami 101! :^D
Now, I originally posted another tutorial last week, but somehow, it got deleted, and is totally erased from the internet! (*GRRAAAA!!!!* <- Me, screaming at the computer in frustration.) So, let’s keep the introduction brief for today, and just jump right into the tutorial!
Level: Easy
Step 1.
Place of your paper color side down, then fold in half triangularly.
Step 2.
Unfold, then fold in half the other way.
Step 3.
Flip the paper over. Then fold the two corners up to the third corner. (As shown bellow)
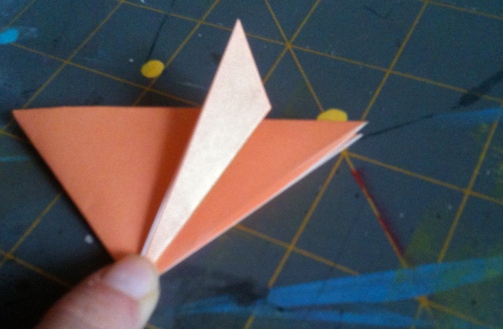
Step 4.
This part’s tricky to explain so watch the slide closely. Grab the two ends between your fingers and fold in half.
Step 5.
Fold one of the right ends over.
Step 6.
Open the fold, then flatten it. This will create the face.
Step 7.
Flip your paper over, and repeat what you did for step 5.
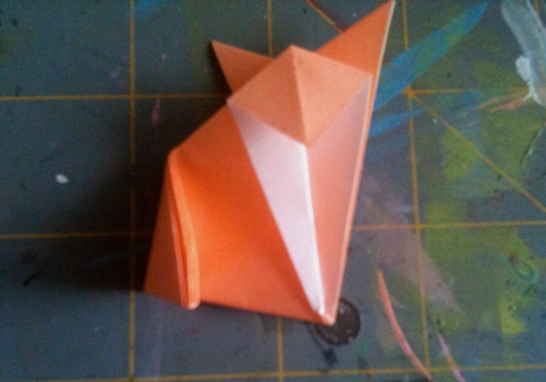
Step 8.
Flip your paper back to the front, and fold the left corner over. This will make the tale and keep your fox upright.
Step 9.
Last step! Take a black marker and add the eyes, nose, and little feet!
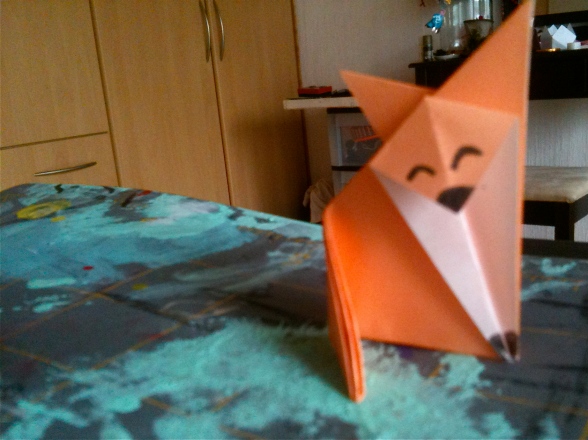
Cute!
Naturally, because it’s winter, I gave this little fox an even tinier fox in his winter coat!
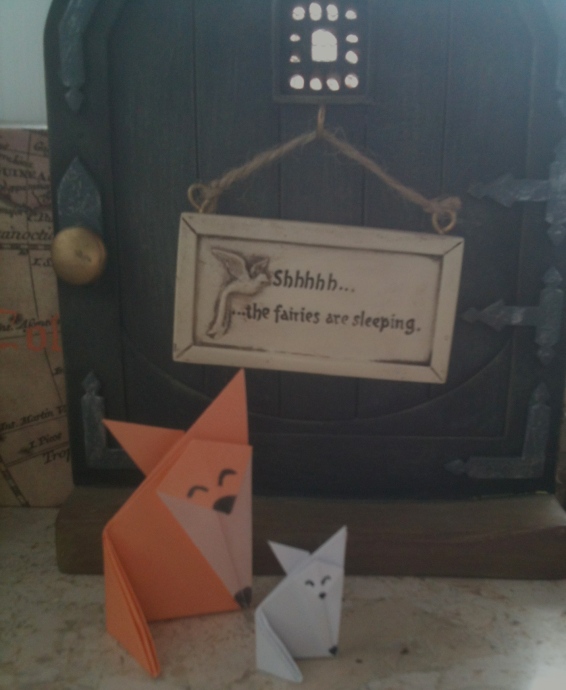
Double Cute!
. . . .
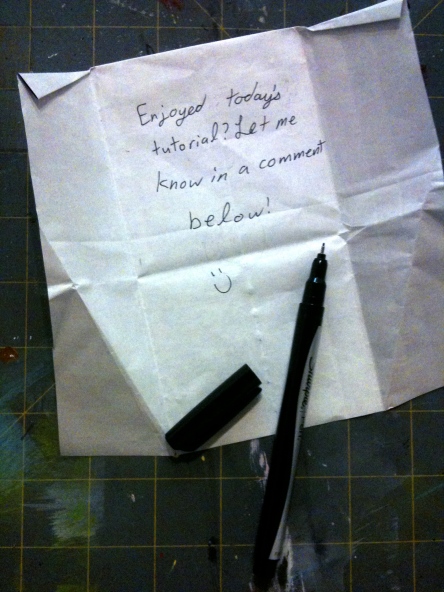
I hope you’ve enjoyed today’s post! Have any suggestions for what next? Leave a comment!
New Year’s Resolutions!
Happy New Year’s everybody! Only a couple more hours until 2016, and only a couple hours left of 2015! Aren’t you excited? Cause I am! The new year will be representing the third year of this little blogs existence, so YAY!

Now, to be honest, I’ve been a little extremely lazy with this blog last year, and I’m really sorry that I haven’t been as attentive as I should have. For my new year’s resolution, I promise to spend a lot more time posting, instead of fermenting into a couch potato. ;^)
Along with the new year, there are going to be a couple major changes around this place. All will be revealed in time, but until then…
Ten Resolutions for Creative People
Green Tip
Be sure to clean up the remains of your fireworks!
Origami Cranes
I love origami. Always have. Unfortunately, I find the instructions impossibly confusing and never managed to make anything. Finally, a family friend taught me how to make a couple different origami items, and I quickly got them (Thanks J!). I decided to make a couple tutorials on how to do them and hopefully, it’ll be easier for you to understand with the photos.

All you’re going to need is a sheet of origami paper! Now, if you don’t have any origami paper, or want to make something smaller, no problem! It’s very easy to turn any paper into origami paper, since the only important thing is for it to be a perfect square!
Step 1
Take the bottom edge of your paper, and fold it to the other side of the paper. It should look like this.

Step 2
Trim off the excess paper, unfold the crease, a you’re ready to fold!


Vwala!
Now that you know how to make a perfect square, let’s get started!
Step 1
Fold your paper in half, take your thumb and drag it along the crease, then unfold it.


Doing this makes the end result much better.

Step 2
Fold it in half again vertically, then triangularly on both ends.

When you’re finished, it should look like this.
Step 3
Fold the paper in half, so it’s a rectangle.

Step 4
This step is somewhat tricky and difficult to explain, so follow along the pictures very carefully.


The inside should look like this.

And the outside like this.
Step 5
Keep your paper facing you as mine is in the photo above, fold in the front half of the paper like this.


Step 6
Turn it over, and repeat.


It’ll look like a miniature kite.
Step 7
Take the top part (the triangle) and fold it over. Rub your fingernail on the crease, then flip the triangle onto the other side and repeat.


Step 8
Now undo the folds.

Step 9
Pay attention closely. You’re going to lift the top piece of paper, and fold it over to make a long diamond.


Step 10
Repeat on the other side.


Step 11
Just like in step 4 and 5, fold in the front half of the paper, then repeat on the other side.


Step 11
Turn the paper over, so it’s facing you sideways, then open the fold.


Step 12
See that crease in the photo above? Take the triangle underneath it and fold it up. Be careful not to rip the paper.

Step 13
Take the top piece of the paper and close it.


Like this.

This is what it should look like when you flip it over.
Step 14
Repeat on the other side.
Step 15
See the two pieces of paper sticking out? Take one of them and fold them over and pinching it. This will make the beak.


Step 16
Here comes the magical part! Take the two large triangles, and gently pull them down.

Magic!
Step 17
To make it stand upright, turn the crane upside down, and pinch the four ends slightly (as you’ll see in the second picture).

Like so.

Now your crane is complete! It’s a little difficult to make in the beginning, but it’s extremely easy to do once you get the hang of it. And since you know how to make more origami paper, you can try using candy wrappers! After getting the technique, I made an extremely small one out of a candy wrapper. It was small enough to fit inside a penny!

Tiny!
You can use cranes as decoration pieces, artwork, make a thousand and make a wish, who knows what else! I hope this tutorial was easy to understand, and once you master the crane, I’ll show you other things you can make out of origami.
Green Tip
When going to the grocery store, bring your own shopping bags instead of using paper or plastic ones. It’ll be better for the earth, and less wasteful of resources.
